How To Diy Bouquet, Simple, Wedding, Ideas ⏬👇
How To Diy Bouquet
Creating your own bouquet is a delightful and personal way to add a touch of nature’s beauty to any occasion. Whether it’s for a special event, a thoughtful gift, or simply to brighten your space, crafting your bouquet allows you to select the perfect flowers and arrangement that reflect your style and sentiments. In this guide, we will explore the art of How To Diy Bouquet, from selecting the right flowers to arranging them in a way that evokes elegance and charm. Let’s get started on your floral journey!
How To Make A Simple Bouquet
Making a simple bouquet is a wonderful way to add a touch of natural beauty to your surroundings. Here’s a basic guide to help you create a straightforward and lovely bouquet:
Materials You’ll Need:
- Fresh flowers of your choice
- Pruning shears or sharp scissors
- Floral tape or rubber bands
- Ribbon or twine
- Vase or container
Steps:
- Choose Your Flowers: Select the flowers you want to include in your bouquet. You can choose a single type of flower for simplicity or mix different varieties for a diverse look.
- Prepare Your Flowers: Trim the stems of your flowers at an angle with pruning shears or sharp scissors. Remove any leaves that will be below the waterline in your vase.
- Arrange the Flowers: Hold one flower in your hand and start adding others around it, rotating the bouquet as you go. As you add more flowers, they will naturally form a bouquet shape.
- Secure the Stems: Once you’re satisfied with the arrangement, use floral tape or rubber bands to secure the stems together, about an inch below the flower heads.
- Trim the Stems: Trim the stems to your desired length, considering the height of your vase.
- Wrap with Ribbon or Twine: To add a finishing touch, wrap the stems with a decorative ribbon or twine. You can tie a bow or leave it simple, depending on your preference.
- Place in a Vase: Insert your bouquet into a vase or container filled with fresh water.
Your simple DIY bouquet is now ready to grace your home or make a lovely gift for someone special. Enjoy the beauty of your creation!
Bouquet Of Flowers Diy
Creating a DIY bouquet of flowers is a delightful and creative endeavor. Here’s a step-by-step guide to making your own beautiful bouquet:
Materials You’ll Need:
- Fresh flowers of your choice
- Pruning shears or sharp scissors
- Floral tape or rubber bands
- Ribbon or twine
- Vase or container
- Water
Steps:
- Gather Your Flowers: Select a variety of fresh flowers and greenery that you love. You can choose flowers of different colors, shapes, and sizes to create an appealing bouquet.
- Prepare the Flowers: Trim the stems of your flowers at a slight angle to ensure they can absorb water effectively. Remove any leaves that will be submerged in the vase.
- Create a Base: Start with a focal flower, the one you want to be the centerpiece of your bouquet. Hold it in your hand and add other flowers and greenery around it, creating a balanced and pleasing arrangement.
- Arrange the Flowers: Continue adding flowers, one at a time, while rotating the bouquet to ensure an even distribution. Try to vary the heights and colors for a dynamic look.
- Secure the Bouquet: Once you’re satisfied with the arrangement, use floral tape or rubber bands to secure the stems together, just below the flower heads.
- Trim and Shape: Trim the stems to your desired length, keeping in mind the height of your vase. Use your shears to shape the bouquet, cutting at different lengths to create a natural and layered appearance.
- Wrap the Stems: For an elegant touch, wrap the stems with a decorative ribbon or twine. You can tie a bow or leave it simple, depending on your style.
- Place in a Vase: Insert your bouquet into a vase or container filled with fresh water. Ensure the stems are submerged, as this helps the flowers stay hydrated and fresh.
- Maintenance: Change the water in the vase every few days and retrim the stems slightly to prolong the bouquet’s freshness.
Your DIY bouquet of flowers is now ready to adorn your home or make a thoughtful gift for someone special. Enjoy the beauty and fragrance of your handmade creation!
How To Make Flower Bouquets
Creating beautiful flower bouquets is a wonderful way to express creativity and bring a touch of nature indoors. Here’s a general guide on how to make flower bouquets:
Materials You’ll Need:
- Fresh flowers of your choice
- Pruning shears or sharp scissors
- Floral tape or rubber bands
- Ribbon or twine
- Vase or container
- Water
Steps:
- Select Your Flowers: Choose a variety of fresh flowers, considering different colors, shapes, and sizes to create an appealing bouquet. You can use a single type of flower or mix several.
- Prepare the Flowers: Trim the stems of your flowers at an angle, removing any leaves that will be submerged in the vase. This helps the flowers absorb water more effectively.
- Create a Base: Start with a focal flower, the one you want to be the centerpiece of your bouquet. Hold it in your hand and add other flowers and greenery around it, forming a balanced arrangement.
- Arrange the Flowers: Continue adding flowers and greenery one by one, rotating the bouquet to maintain even distribution. Vary the heights and colors for an attractive and dynamic look.
- Secure the Stems: Once you’re satisfied with the arrangement, use floral tape or rubber bands to secure the stems together, just below the flower heads.
- Trim and Shape: Trim the stems to your desired length, considering the height of your vase. Use your shears to create a natural and layered appearance by cutting at different lengths.
- Wrap the Stems: For a decorative touch, wrap the stems with a ribbon or twine. You can tie a bow or leave it plain, depending on your style.
- Place in a Vase: Insert your bouquet into a vase or container filled with fresh water. Ensure the stems are submerged to keep the flowers hydrated.
- Maintenance: Change the water in the vase every few days, retrim the stems slightly, and remove any wilted flowers to prolong the bouquet’s freshness.
With these steps, you can create stunning flower bouquets to decorate your home or share with loved ones. The possibilities are endless, so let your creativity bloom!
Diy Bouquets For Wedding
Creating DIY bouquets for a wedding can add a personal and special touch to the big day. Here’s a guide to help you make beautiful bouquets for your wedding:
Materials You’ll Need:
- Fresh flowers of your choice
- Pruning shears or sharp scissors
- Floral tape or rubber bands
- Ribbon or twine
- Floral pins or wire
- Vases or containers with water
- Greenery (optional)
Steps:
- Plan and Gather: Decide on the color scheme and types of flowers you want for your wedding bouquets. Purchase the necessary flowers and materials in advance.
- Prepare the Flowers: Trim the stems of your flowers at an angle and remove any leaves that will be below the waterline. Keep the flowers in water until you’re ready to arrange them.
- Create a Base: Start with a focal flower for each bouquet. Hold it in your hand and add other flowers and greenery around it, creating a balanced arrangement.
- Arrange the Bouquet: Continue adding flowers, one at a time, while rotating the bouquet to ensure even distribution. Vary the heights and colors for an attractive and dynamic look.
- Secure the Stems: Once you’re satisfied with the arrangement, use floral tape or rubber bands to secure the stems together, just below the flower heads.
- Trim and Shape: Trim the stems to your desired length, considering the size of the bouquets. Use your shears to create a natural and layered appearance by cutting at different lengths.
- Wrap the Stems: For an elegant touch, wrap the stems with ribbon or twine, and secure it with floral pins or wire. You can tie a bow or leave it simple, depending on your style.
- Place in Water: Place the finished bouquets in vases or containers filled with fresh water until the wedding ceremony.
- Keep Fresh: On the wedding day, keep the bouquets in a cool and shaded place. Spray them with water to keep them hydrated.
Creating DIY bouquets for your wedding allows you to customize the flowers to match your wedding theme and add a personal touch to the event. Enjoy the process and the beauty of your handmade bouquets on your special day!
Diy How To Make A Wedding Bouquet
Creating your own wedding bouquet is a wonderful way to add a personal touch to your special day. Here’s a step-by-step guide on how to make a DIY wedding bouquet:
Materials You’ll Need:
- Fresh flowers of your choice (consider the wedding theme and color scheme)
- Pruning shears or sharp scissors
- Floral tape
- Ribbon or twine
- Floral pins or wire
- Vase with water
Steps:
- Plan and Purchase: Decide on the types and colors of flowers you want for your bouquet. Buy the flowers in advance and have extra in case of mistakes.
- Prepare the Flowers: Trim the stems of your flowers at an angle and remove any leaves that will be submerged in the vase. Keep the flowers in water until you’re ready to arrange them.
- Create a Base: Start with a focal flower, which will be the centerpiece of your bouquet. Hold it in your hand and add other flowers and greenery around it, creating a balanced arrangement.
- Arrange the Bouquet: Continue adding flowers and greenery, rotating the bouquet to ensure even distribution. Vary the heights, shapes, and colors for an attractive look.
- Secure the Stems: Use floral tape to bind the stems together, just below the flower heads, to hold the bouquet in place.
- Trim and Shape: Trim the stems to your desired length, considering the size and shape you want for your bouquet. Cut at different lengths for a natural appearance.
- Wrap the Stems: For a finishing touch, wrap the stems with ribbon or twine, securing it with floral pins or wire. Customize the ribbon with a bow or decorative accents.
- Place in Water: Place the finished bouquet in a vase with fresh water until the wedding ceremony. Keep it in a cool and shaded area to maintain freshness.
- Enjoy Your DIY Bouquet: Your handmade wedding bouquet is ready to accompany you down the aisle. Embrace the beauty and personal significance of your creation.
Creating your own wedding bouquet is a meaningful and creative endeavor that allows you to express your unique style on your special day. Enjoy the process and the beauty of your DIY bouquet.
Bouquet Aquarelle
Un bouquet aquarelle est une technique artistique de peinture qui consiste à créer une représentation de fleurs ou de plantes en utilisant des couleurs aquarelles. Cette technique permet de capturer la beauté et la délicatesse des fleurs avec des tons doux et des transitions subtiles entre les couleurs. Pour réaliser un bouquet aquarelle, voici quelques étapes de base :
- Sélection des Fleurs : Choisissez les fleurs que vous souhaitez représenter dans votre bouquet aquarelle. Vous pouvez vous inspirer de vrais bouquets de fleurs ou créer votre propre composition florale.
- Esquisse : Commencez par dessiner une esquisse légère de votre bouquet sur votre papier aquarelle. Assurez-vous de positionner les fleurs et les feuilles de manière équilibrée.
- Couleurs : Préparez votre palette de couleurs aquarelles. Les couleurs varieront en fonction des fleurs que vous représentez. Utilisez des couleurs douces et transparentes pour un effet aquarelle réaliste.
- Premières Couches : Appliquez d’abord des couches légères de couleur pour chaque fleur et feuille. Laissez sécher entre les couches pour éviter que les couleurs ne se mélangent de manière indésirable.
- Détails : Une fois les couches de base sèches, ajoutez des détails tels que les ombres, les contours et les nuances. Cela donnera de la profondeur à votre bouquet.
- Finitions : Terminez en ajoutant des détails comme les tiges des fleurs, les gouttelettes d’eau (pour un aspect frais), et tout autre élément que vous souhaitez inclure.
- Cadrez et Signez : Lorsque votre bouquet aquarelle est terminé, découpez-le ou encadrez-le selon vos préférences. N’oubliez pas de signer votre œuvre.
Un bouquet aquarelle peut être un merveilleux cadeau ou une pièce artistique pour décorer votre espace. C’est une façon créative et artistique de capturer la beauté intemporelle des fleurs.
Diy Bouquet Ideas
Creating your own DIY bouquet is a delightful way to add a personal touch to various occasions, from weddings to home decor. Here are some bouquet ideas to inspire your creativity:
- Wildflower Bouquet: Gather an assortment of wildflowers, daisies, and Queen Anne’s lace for a rustic and charming bouquet.
- Rose Bouquet: Roses come in various colors, and you can mix and match them to create a classic and romantic bouquet.
- Succulent Bouquet: Combine different succulent varieties for a trendy and long-lasting bouquet.
- Herb Bouquet: Use aromatic herbs like rosemary, lavender, and mint for a fragrant and unique bouquet.
- Sunflower Bouquet: Bright and cheerful, sunflowers make a stunning bouquet on their own or mixed with other blooms.
- Tulip Bouquet: Tulips offer a simple and elegant option, available in numerous colors to suit your theme.
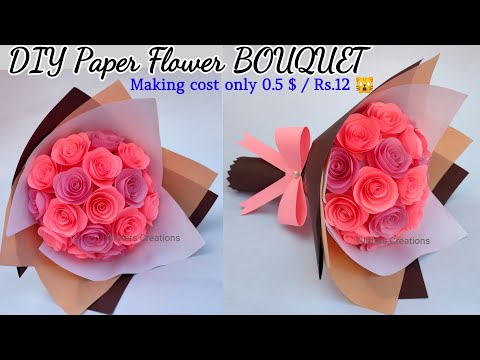
- Paper Flower Bouquet: Craft paper flowers for a bouquet that lasts forever. Ideal for weddings and home decor.
- Baby’s Breath Bouquet: Create an ethereal and delicate bouquet using baby’s breath. Perfect for weddings and special occasions.
- Peony Bouquet: Peonies are known for their lush petals and are perfect for creating a luxurious and romantic bouquet.
- Daisy Chain Bouquet: A whimsical and playful option, daisy chains are perfect for a relaxed, garden-style bouquet.
- Tropical Bouquet: Use vibrant tropical flowers like orchids and hibiscus for a unique and exotic bouquet.
- Anemone Bouquet: Anemones add a pop of color and elegance to any bouquet with their dark centers and delicate petals.
- Fall Foliage Bouquet: Embrace the autumn season with a bouquet made from colorful fall leaves and berries.
- Monochromatic Bouquet: Choose flowers in a single color for a striking and modern bouquet.
- Brooch Bouquet: Incorporate brooches, buttons, or jewelry into your bouquet for a glamorous and vintage look.
- Cotton Bouquet: Cotton stems mixed with greenery create a cozy and rustic bouquet.
- Lavender Bouquet: Lavender adds fragrance and a touch of purple to your bouquet.
- Minimalist Bouquet: Sometimes, less is more. Create a minimalist bouquet with a few, carefully chosen blooms.
- Boho Bouquet: Combine various textures and styles of flowers, often with loose and cascading elements for a bohemian look.
- Feather Bouquet: Feathers add a unique and dramatic touch to your bouquet, ideal for themed weddings.
Feel free to mix and match these ideas, choose your favorite flowers, and get creative with your bouquet. DIY bouquets are a fantastic way to express your personal style and create something truly special for any occasion.
Diy Bouquet Wrap
Creating a beautiful DIY bouquet wrap is a wonderful way to add a personal touch to your bouquet. Here are some ideas and steps to help you design your own bouquet wrap:
Materials You’ll Need:
- Ribbon or twine
- Lace, tulle, or fabric
- Decorative pins or brooches (optional)
- Scissors
- Glue gun (optional)
Steps:
- Select Your Wrap Material: Choose a fabric or ribbon that complements the style and color scheme of your bouquet. Lace, tulle, and burlap are popular choices. Make sure it’s long enough to wrap around the bouquet with some extra for tying or draping.
- Measure and Cut: Measure the length of the material needed to wrap around your bouquet. Cut it to the desired length, leaving extra for any decorative draping or trailing ends.
- Wrap the Bouquet: Carefully wrap the selected material around the base of your bouquet, just below the flower heads. You can choose to wrap it snugly for a neat look or loosely for a more casual, rustic appearance.
- Secure the Wrap: Use a small amount of glue or a decorative pin to secure the wrap in place. Ensure it’s tight enough to hold the bouquet together.
- Add Decorative Elements: To enhance the bouquet wrap, you can add decorative elements like brooches, pearls, or beads. Simply attach them with glue or pins.
- Tie a Bow or Knot: Finish the wrap by tying a bow or knot with the excess material. You can make a simple bow or a more elaborate one, depending on your style.
- Trim Excess Material: Trim any excess material to the desired length, ensuring it’s neat and tidy.
- Adjust and Arrange: Adjust the bouquet wrap to your liking, ensuring it complements the bouquet’s overall appearance.
- Final Inspection: Carefully inspect your DIY bouquet wrap to ensure everything is secure and looks as you envisioned.
- Display: Your beautifully wrapped bouquet is ready to be displayed or carried down the aisle. It adds a lovely and personal touch to any special occasion.
Remember, the key to a stunning bouquet wrap is to choose materials that match your theme and personal style. Whether it’s a rustic burlap wrap for a countryside wedding or an elegant lace wrap for a classic ceremony, your DIY bouquet wrap will add a unique and memorable element to your bouquet.
Diy Bouquet Kit
Creating your own DIY bouquet can be a fun and rewarding project, but it often requires sourcing all the necessary materials. A DIY bouquet kit can be a convenient solution, as it typically includes the essential items needed to craft a beautiful bouquet. Here’s what you might find in a DIY bouquet kit:
- Flowers: The kit may include artificial flowers, silk blooms, or dried flowers. You can choose a kit with specific flower types and colors to match your preferences or event theme.
- Greenery: Greenery is often included to complement the flowers and add depth to the bouquet. You may find leaves, stems, or foliage in the kit.
- Floral Wire or Floral Tape: These are essential for securing the bouquet’s components together. Floral wire and tape provide structure and hold everything in place.
- Bouquet Holder: Some kits come with a bouquet holder, which is a handle that makes it easier to arrange and carry the bouquet. It typically has a water reservoir to keep real flowers fresh.
- Ribbons and Wrap: Ribbons and wrap materials, such as burlap or lace, are included for decorating and securing the bouquet.
- Decorative Pins or Brooches: These are optional but can add a touch of elegance to your bouquet. You can use them to attach ribbons or secure the bouquet wrap.
- Instructions or Tutorials: Many kits provide instructions or online tutorials to guide you through the bouquet-making process, making it easier for beginners.
- Tools: Some kits include basic tools like scissors or wire cutters for easier flower and stem manipulation.
- Accessories: Depending on the kit, you might find additional decorative elements like beads, pearls, or crystals to embellish your bouquet.
When choosing a DIY bouquet kit, consider the type of flowers, colors, and style you desire for your bouquet. Some kits are designed for specific occasions, such as weddings or special events, while others offer more general options for various purposes.
A bouquet kit can be a time-saving and cost-effective way to create a beautiful bouquet that matches your vision. It’s a great choice for DIY enthusiasts and those looking to add a personal touch to their floral arrangements.
Diy Bouquet Supplies
If you’re planning to create a DIY bouquet, you’ll need a variety of supplies to bring your floral arrangement to life. Here’s a list of essential DIY bouquet supplies:
- Flowers: Choose your preferred flowers based on your theme, color scheme, and personal style. You can use fresh flowers, artificial silk flowers, or dried flowers.
- Greenery: Greenery, such as leaves, ferns, or eucalyptus, adds depth and texture to your bouquet.
- Floral Wire or Floral Tape: These are used to secure the stems and create a structured bouquet. Floral wire can be used for wiring individual flowers or clusters.
- Bouquet Holder: This is a handle that holds the flowers together, making it easier to arrange and carry the bouquet. Some bouquet holders have a water reservoir to keep fresh flowers hydrated.
- Ribbons and Wrap: Choose decorative ribbons, burlap, lace, or other materials to wrap around the bouquet’s stems for a polished finish.
- Decorative Pins or Brooches: These can add a touch of elegance to your bouquet. Use them to attach ribbons or secure the bouquet wrap.
- Scissors or Wire Cutters: These tools are essential for cutting and shaping flowers and greenery.
- Vase or Container: You’ll need a container to hold your bouquet while you work on it and to store it when not in use.
- Water Sprayer: If you’re using fresh flowers, a water sprayer helps keep them hydrated while you work on your bouquet.
- Flower Food (for fresh flowers): Flower food can prolong the life of fresh flowers. Add it to the vase water if you’re working with real blooms.
- Glue Gun (optional): A glue gun can be useful for attaching decorative elements, like brooches or beads, to your bouquet.
- Corsage Pins: These are handy for securing any loose or trailing ends of ribbon.
- Optional Accessories: Depending on your bouquet design, you might want to include decorative elements like beads, pearls, crystals, or feathers.
- Instructions or Tutorials: If you’re new to bouquet making, instructions or online tutorials can provide valuable guidance.
- Personal Touch: Your unique vision and creativity are essential DIY supplies. Customize your bouquet to reflect your style and the occasion.
Remember to select your supplies based on the type of bouquet you want to create. Whether it’s a rustic, boho, classic, or modern bouquet, the right supplies will help you bring your floral vision to life.
Diy Bouquet Bar
A DIY bouquet bar is a creative and interactive setup that allows guests to create their own custom bouquets, making it a popular choice for events such as weddings, bridal showers, or parties. Here’s how to set up a DIY bouquet bar:
Materials and Supplies:
- Flowers: Provide a variety of fresh flowers in different colors and types. Consider seasonal blooms that match your event’s theme.
- Greenery: Offer various types of greenery like eucalyptus, ferns, or baby’s breath to complement the flowers.
- Vases or Containers: Use an assortment of vases, buckets, or mason jars to display the flowers and greenery for easy selection.
- Bouquet Holders: Provide bouquet holders with water reservoirs to keep the flowers fresh and hydrated.
- Floral Wire and Floral Tape: These supplies are essential for securing the bouquet stems.
- Scissors or Pruners: Include scissors or pruners for guests to cut and trim the flowers and greenery.
- Ribbons and Wrap: Offer a selection of ribbons, twine, or fabric for guests to wrap around their bouquets.
- Decorative Pins or Brooches: Add some sparkle with decorative pins or brooches that guests can use to embellish their bouquets.
- Corsage Pins: These are handy for securing any loose or trailing ends of ribbon.
- Water Sprayers: If you’re using fresh flowers, provide water sprayers to keep the blooms hydrated.
- Table and Display: Set up a table or station with a stylish display where guests can easily access all the materials.
Instructions:
- Arrange the Flowers: Set up the flowers and greenery in vases or containers, making sure to separate them by type and color.
- Provide Instructions: Place a sign or instruction cards with basic guidelines on how to create a bouquet. Include tips on selecting flowers, arranging them, and wrapping the bouquet.
- Choose a Wrapping Station: Designate an area with ribbons, wraps, and decorative pins where guests can wrap and personalize their bouquets.
- Create a Sample Bouquet: Display a sample bouquet at the DIY bar to inspire guests and provide an example of what they can create.
- Assistance: If possible, have a knowledgeable assistant or florist available to provide guidance and assistance to guests.
- Packaging: Offer paper or boxes to protect the bouquets during transportation.
- Photography: Consider setting up a photo booth nearby to capture memorable moments as guests create their bouquets.
A DIY bouquet bar adds a delightful and interactive element to your event, allowing guests to express their creativity while creating their own custom bouquets. It’s a unique and memorable experience that can make any celebration even more special.
Diy Bouquet Preservation
Preserving a DIY bouquet is a wonderful way to cherish the memories of a special event or to extend the life of a beautiful floral arrangement. Here are some methods to preserve your DIY bouquet:
- Air Drying:
- Choose blooms that air dry well, such as roses, lavender, or baby’s breath.
- Gather the flowers in small bunches, tie them with twine, and hang them upside down in a dry, dark, and well-ventilated area.
- Leave them to dry for a few weeks until they’re completely dry to the touch.
- Silica Gel:
- Purchase silica gel, which is a desiccant used for drying flowers.
- Fill a container with a layer of silica gel and place the bouquet on top.
- Gently pour more silica gel over the bouquet, ensuring that the flowers are completely covered.
- Seal the container and leave it for a week or more, depending on the flower type.
- Pressing:
- Pressing is an ideal method for preserving delicate flowers like daisies, pansies, or violets.
- Place the flowers between the pages of a heavy book or a flower press.
- Leave them for several weeks to flatten and dry.
- Resin Casting:
- Resin is a popular choice for preserving flowers while creating decorative pieces.
- Arrange the flowers in a mold, pour epoxy resin over them, and let it cure.
- This creates a clear, permanent display of your bouquet.
- Microwave Drying:
- While it requires a microwave flower press, this method is quicker than traditional pressing.
- Place the flowers in the microwave press, heat in short intervals, and check their dryness.
- Freeze-Drying:
- Consider professional freeze-drying services for preserving your bouquet. It’s the most effective method for retaining the natural color and shape of flowers.
- Hairspray:
- After the flowers are dry, you can use hairspray to help protect them from dust and damage.
- Display Shadow Box:
- Arrange the dried flowers in a shadow box or frame to create a beautiful display piece for your home.
Remember to handle the flowers with care during the preservation process to avoid damaging them. The method you choose depends on the types of flowers you have and the level of preservation you desire. Whether it’s a simple bouquet or a special arrangement from a significant event, preserving your DIY bouquet allows you to enjoy its beauty for years to come.
Bouquet Of Roses
A bouquet of roses is a classic and timeless choice for various occasions, symbolizing love, admiration, and appreciation. Whether you’re planning to create a DIY bouquet of roses or looking for ideas to buy one, here are some tips to consider:
Creating a DIY Bouquet of Roses:
- Selecting Roses:
- Choose fresh, high-quality roses with vibrant colors and healthy petals.
- Decide on the rose color based on the occasion; for example, red roses signify love and passion, while white roses symbolize purity and innocence.
- Gathering Supplies:
- You’ll need a clean vase or container, floral shears, greenery (such as eucalyptus or ferns), and ribbon or twine for wrapping.
- Preparing Roses:
- Trim the stems at an angle to ensure efficient water absorption.
- Remove any leaves that will be submerged in water to prevent bacterial growth.
- Hydrate the roses by placing them in water for a few hours before arranging the bouquet.
- Creating the Arrangement:
- Start by placing the greenery in the vase to form a base for the roses.
- Add the roses one by one, arranging them at varying heights and angles for a natural look.
- Adjust the position and height of each rose until you’re satisfied with the arrangement.
- Wrapping and Tying:
- Use ribbon, twine, or a decorative wrap to secure the bouquet.
- Ensure the stems are well-tied to keep the roses in place.
- Personalize with a Card:
- Attach a personalized card to convey your message or sentiments.
Buying a Bouquet of Roses:
- Florist:
- Visit a local florist to select a pre-made bouquet of roses.
- You can discuss your preferences and have a professional florist create a custom arrangement.
- Online Flower Delivery:
- Many online flower delivery services offer a wide selection of rose bouquets.
- You can choose from different colors, sizes, and arrangements and have them delivered to your desired location.
- Grocery Stores and Supermarkets:
- Some grocery stores and supermarkets also offer fresh rose bouquets at affordable prices.
- Farmers’ Markets:
- Explore local farmers’ markets for unique and fresh rose bouquets from local growers.
A bouquet of roses makes a thoughtful gift for occasions like anniversaries, birthdays, Valentine’s Day, or simply to express your affection and appreciation. Whether you create your own bouquet or purchase one, the beauty and symbolism of roses will surely brighten someone’s day.
Kitchen Bouquet
Kitchen Bouquet is a browning and seasoning sauce that is commonly used in cooking to enhance the color and flavor of various dishes, particularly gravies, soups, and sauces. It is a versatile kitchen ingredient with a rich history. Here’s a brief overview of Kitchen Bouquet:
1. Browning and Coloring:
- Kitchen Bouquet is primarily used to darken and enhance the color of gravies, sauces, and other dishes. It adds an appetizing brown hue to the food, making it visually appealing.
2. Flavor Enhancement:
- In addition to coloring, Kitchen Bouquet imparts a subtle, savory flavor to the dishes it is added to. It can contribute to the overall taste of the dish.
3. Ingredients:
- The main ingredients of Kitchen Bouquet typically include caramel, vegetable base, and seasonings. It is commonly used as a vegetarian and vegan-friendly browning sauce.
4. Versatility:
- Kitchen Bouquet can be used in a wide range of recipes, including meat-based dishes, vegetarian options, and sauces. It’s a go-to choice for adding depth to the flavor and appearance of dishes.
5. Common Uses:
- It is often used in recipes such as beef stew, pot roast, gravy, and meatloaf, where the browning effect is desired.
6. How to Use:
- Kitchen Bouquet is added in small quantities, usually just a few dashes or drops, depending on the recipe’s size. It should be added gradually and tasted to ensure the desired color and flavor are achieved.
7. Availability:
- Kitchen Bouquet is readily available in many grocery stores and can be found in the condiment or cooking supplies aisle.
Remember that while Kitchen Bouquet is a popular choice for browning and seasoning, there are alternative methods to achieve similar results. Some home cooks use techniques like reducing pan drippings or using broth and seasonings to achieve the desired color and flavor in their dishes. However, Kitchen Bouquet offers a convenient and consistent option for those who prefer a ready-made solution for their culinary needs.
Kitchen Bouquet Browning Sauce
Kitchen Bouquet Browning Sauce is a classic and versatile kitchen condiment known for its ability to enhance the color and flavor of a wide variety of dishes. Here’s more information about Kitchen Bouquet Browning Sauce:
1. Browning and Seasoning:
- Kitchen Bouquet is primarily used to add a rich brown color to gravies, sauces, and other dishes, giving them an appetizing appearance.
2. Flavor Enhancement:
- In addition to browning, it imparts a subtle, savory flavor to dishes, enhancing their taste.
3. Ingredients:
- The main ingredients typically include caramel, vegetable base, and seasonings. It is often used as a vegetarian and vegan-friendly browning sauce.
4. Versatility:
- Kitchen Bouquet is incredibly versatile and can be used in a wide range of recipes, from meat-based dishes like pot roasts and stews to vegetarian options and sauces.
5. How to Use:
- Kitchen Bouquet is added in small quantities, usually just a few drops or dashes, depending on the recipe’s size. It should be added gradually and adjusted to achieve the desired color and flavor.
6. Common Uses:
- It is commonly used in dishes like beef stew, pot roast, meatloaf, and gravies to achieve the desired browning and flavor.
7. Availability:
- Kitchen Bouquet Browning Sauce is readily available in many grocery stores and can be found in the condiment or cooking supplies aisle.
It’s worth noting that while Kitchen Bouquet is a popular choice for browning and seasoning, there are alternative methods to achieve similar results in cooking. Some home cooks use techniques like reducing pan drippings or using broth and seasonings to achieve the desired color and flavor in their dishes. However, Kitchen Bouquet offers a convenient and consistent option for those who prefer a ready-made solution for their culinary needs.
Bouquet Garni
A bouquet garni is a classic and aromatic bundle of herbs, typically used in French cuisine to flavor soups, stews, sauces, and stocks. It consists of a combination of fresh herbs that are tied together or enclosed in a cheesecloth or muslin bag. The bouquet garni infuses the dish with subtle herbal flavors and can be easily removed once the cooking process is complete. Here’s how to create a basic bouquet garni and some common herbs used in it:
Creating a Bouquet Garni:
- Select Herbs: Choose a combination of fresh herbs to create your bouquet garni. Common choices include:
- Parsley: Adds a fresh and mild flavor.
- Thyme: Provides earthy and slightly floral notes.
- Bay Leaves: Contribute a subtle, aromatic quality.
- Rosemary: Imparts a woody and fragrant taste.
- Sage: Offers a savory and slightly peppery element.
- Marjoram: Adds a gentle, sweet, and citrusy flavor.
- Bundle Herbs: Arrange the selected herbs in a neat bundle, tying them together with kitchen twine. Alternatively, you can enclose them in a small piece of cheesecloth or muslin fabric and tie it securely.
- Add to Cooking: Place the bouquet garni in the pot or pan while cooking. It will infuse the dish with herbal flavors.
- Remove When Done: Once your dish is ready, carefully remove the bouquet garni, as its purpose is to impart flavor and aroma, not to be consumed.
Customizing Your Bouquet Garni:
You can customize your bouquet garni based on the flavors you want to infuse into your dish. Other herbs like tarragon, oregano, and savory can be added for unique flavor profiles. In some recipes, a slice of leek, a piece of celery, or a garlic clove may also be included in the bundle.
Bouquet garnis are versatile and can be tailored to match the cuisine you’re preparing. Whether you’re making a hearty beef stew, a delicate fish stock, or a rich tomato sauce, a bouquet garni is a wonderful way to elevate the flavor of your dishes.
Halloween Bouquet
A Halloween bouquet is a festive and spooky arrangement of flowers, foliage, and decorative elements that is designed to celebrate the Halloween holiday. These bouquets are a fun and creative way to embrace the spirit of Halloween and add a touch of eerie beauty to your home or event. Here are some ideas for creating a Halloween bouquet:
1. Black and Orange Color Scheme:
- Embrace the classic Halloween colors by using black and orange flowers. You can include black roses or dark purple flowers for a mysterious touch. Complement them with vibrant orange blooms like marigolds or orange lilies.
2. Spooky Elements:
- Add spooky elements like miniature plastic skulls, fake spiders, or plastic bats to give your bouquet a Halloween twist. These elements can be tucked among the flowers or attached to the stems.
3. Seasonal Foliage:
- Incorporate seasonal foliage like dried cornstalks, branches, or twigs. They can add an autumnal feel to your bouquet and create a more rustic, Halloween-inspired look.
4. Pumpkin Vase:
- Use a hollowed-out pumpkin as a vase for your Halloween bouquet. Carve a pumpkin with a spooky face or intricate design, place a container inside to hold water, and arrange your flowers within.
5. Glowing Accents:
- Consider adding glowing elements to your bouquet, such as LED string lights or glow sticks, to create an eerie, otherworldly effect. These can be woven through the bouquet for added drama.
6. Witch’s Broom Handle:
- Attach a small witch’s broomstick as a handle for your bouquet. It can be a playful nod to witchcraft and adds a touch of whimsy.
7. Halloween Ribbon or Fabric:
- Wrap a Halloween-themed ribbon or piece of fabric around the bouquet to tie all the elements together. Look for ribbons featuring ghosts, pumpkins, or spiderwebs.
8. Themed Flower Selection:
- Choose flowers that are associated with Halloween, such as dark calla lilies, black dahlias, and orange zinnias. These flowers can be the focal point of your bouquet.
Creating a Halloween bouquet allows you to express your creativity and get into the Halloween spirit. Whether you’re decorating your home for a Halloween party or sending a spooky surprise to a friend, a Halloween bouquet is a unique and festive way to celebrate the holiday.
Bouquet De Fleurs Anniversaire
Un bouquet de fleurs est un cadeau classique et intemporel pour célébrer un anniversaire. Il peut être offert à un être cher pour marquer cette occasion spéciale. Voici quelques idées pour un bouquet de fleurs d’anniversaire :
- Roses Multicolores : Les roses sont toujours un choix populaire. Optez pour un bouquet de roses multicolores pour symboliser l’amour, la joie et la diversité.
- Lys Élégants : Les lys sont des fleurs majestueuses qui évoquent la sophistication. Un bouquet de lys blancs est un choix élégant pour un anniversaire.
- Tournesols Lumineux : Les tournesols apportent une touche de soleil et de bonheur à n’importe quelle occasion. Ils sont parfaits pour un anniversaire estival.
- Géraniums Rouges : Les géraniums rouges sont vibrants et symbolisent la passion. Ils sont parfaits pour exprimer un amour ardent.
- Marguerites Blanches : Les marguerites blanches évoquent l’innocence et la pureté. Elles sont idéales pour les anniversaires des personnes spéciales de votre vie.
- Fleurs des Champs : Un bouquet de fleurs des champs donne une ambiance rustique et champêtre à l’anniversaire. Il est naturel et authentique.
- Fleurs Exotiques : Si vous voulez surprendre, optez pour des fleurs exotiques comme les orchidées ou les oiseaux du paradis. Elles apportent une touche d’exotisme.
- Combinaison de Fleurs : Vous pouvez également créer un bouquet en combinant plusieurs types de fleurs pour une composition unique et personnalisée.
N’oubliez pas d’ajouter une carte d’anniversaire avec un message spécial pour compléter votre cadeau. Quel que soit le choix que vous faites, un bouquet de fleurs apporte de la beauté et de la joie à cette journée spéciale.


